A Card Tutorial
OMG! I can't believe its July!! Seriously...time is flying by!
The next few months are going to be crazy. July, August, September & October are birthdays, birthdays and more birthdays. In August my (not so) little boy (anymore) will be turning 3 and October marks my baby's first birthday! They both just need to STOP growing...
So...for me this means birthday planning, attending parties...Oh! and did I mention a family ski holiday that's fast approaching (totally not organised, but still very excited). Crazy times ahead...but I love crazy and to make things more interesting I'm making more cards then ever...Whoohoooo!
I wanted to start off July by sharing a card tutorial with you. I always wanted to share more with my blog readers. I personally love watching YouTube videos and getting inspiration and new techniques from many of the crafty blogs I follow. I'm not quite ready to make a video but I thought I'd at least take some photos to show you my creative process in making this card. Apologies now, I decided to do this tutorial half way through making this card, so some photo may appear out of order, but the written instructions should make more sense :)
This card uses left overs from Paper Flourish Kaisercraft July Kit (which I am designing for), stickers from the Kaisercraft Fly Free collection and Kaisercraft Decorative Dies - Tags (which can be purchased from Paper Flourish along side their July kit. For more information on these kits and where to purchase...go here. :)
I mainly want to demonstrate how easy it is to stretch out die cuts to create unique cards. I'm working on another example and hope to share this with you some time in July.
Supplies from July Kit: Fly Free Friend Pattern Paper. Kaisercraft Decorative Dies - Tag Shapes
Other: White Card Stock, Kaisercraft Fly Free Sticker Sheet, Wink of Stella - clear, Copics (V09, R37), Gold thread, Gold leaf pen, Sequins, Rhinestones - silver.
'Give Your Dreams Wings' Tutorial:
- 1. Using white card stock die cut a rectangle. Alternatively use measurements below to cut a rectangle.
Measurements: 4 1/4 inches x 5 1/2 inches
- 2. Using paper FF Friend die cut a smaller rectangle.
Measurements: 4 3/4 inches x 3 1/2 inches
Adhere using double sided tape to white card.
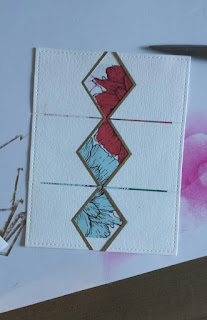
- 3. Using the fishtail tag from Kaisercraft Decorative Dies - Tag shapes - die cut 6 tags (using white card).
- 4. Optional: Using a masking technique create a little gold border (fishtail end of tag) using gold leaf pen.
- 5. Position tags (see photo). I used re-positional tape at this stage as I wanted to add the gold trim (in previous step).
Use double sided tape to adhere tags to card.
Next die cut (the rectangle again) or trim off excess white tag using scissor/guillotine.
- 6. Add interest.
I stuck some gold twine down using glue dots (positioned behind butterflies).
Added the butterflies using foam dots to give the card some dimension.
Then I added the sentiment sticker to white card, made it into a banner and added some gold with the gold leaf pen. I stuck this down to the card using foam tape.
- 7. Add MORE interest.
I added Wink of Stella - clear to the butterfly wings.
Coloured some silver Rhinestones using Copic Markers and added a few sequins.
- 8. Adhere this to top folding card base.
Done!!
I'll be posting another card or two showing more creative way to use this Tag die cut - exciting!!!!! Meanwhile this post has also got me thinking whether there are other dies in my collection that can be used in different ways...I think I'll have to go through them all now to find out :)
Thanks for stopping by. I hope you enjoyed this tutorial - feedback most welcomed.
Samantha


Very pretty card....I love your interesting layout! I thought it was pretty difficult at first until I read your tutorial! Thanks so much for sharing that! We're so glad you played with the Players this week!
ReplyDeleteWow, what a gorgeous card, Samantha! I love all the great layers and attention to detail. Thanks for sharing the tutorial, and thanks so much for playing along with us this week at The Paper Players!
ReplyDelete