Posts

Showing posts with the label Card

Elizabeth Craft Designs: Masculine/Father's Day Card

Image
Hello and Welcome! Elizabeth Craft Designs are showcasing Masculine/Father's Day cards on their blog! Here is my take on this months creative theme. I decided to turn them in to birthday cards - but these are such a gender neutral design that you could put any sentiment on and it would work! I used Elizabeth Craft Designs: Geometric Background die along with Elizabeth Craft Designs: Your Day Stamp Set. I coloured the first card using Elizabeth Craft Designs: Watercolour Palette . Happy Crafting! Samantha

Elizabeth Craft Designs: You Are Awesome!

Image
Hello, Welcome! Today I'm sharing a fun card I made using Elizabeth Craft Designs latest release.   Supplies Used: Dog Die Dog House Die Tree Die Build Your Own Sentiment Stamp Silk Microfine Glitter - Crystal Clear Clear Double Sided Adhesive Tape Other: Corrugated Card Cardstock Sequins Black Ink Cuttlebug Sewing Machine Twine Bow Happy Crafting!

Mega Blog Hop for Pear Blossom Press

Image
Hello! Welcome! I'm so happy to be apart of Pear Blossom Press MEGA Hop! A few weeks ago I was asked to participate in this blog and try out Amanda's Power Pack Kit. I love interactive cards so I wasn't going to pass up this opportunity and I'm so glad I did because without this switch I wouldn't have been able to make a card like this...Let me explain! Previously when I've made interactive light em' up cards I've had to create my own paper switch - this involved lots of foam tape (I like layers but not the thickness produced by the amount of foam tape used). The circuit and paper switch would also be very sensitive so I had to be creative on how I layered my card font together and in every case I'd have to leave out machine stitching (which if you follow my style would know I really enjoy adding this textural element to my handmade cards). The stitching and card front pressure would permanently close the circuit and the light would be constant...

Elizabeth Craft Designs: You Make Me Happy!

Image
Spring themed cards for inspiration are being showcased on the Elizabeth Craft Designs Blog. Here is what I came up with using Elizabeth Craft Designs: Small and Large Flower Die . This was a very simple card to create - just good old die cut layering using bright coloured cardstock and vellum. The Banner Sentiments stamp (and co-ordinating die) had the perfect sentiment "You make me happy!" I embellished the card with machine stitched lines, sequins and a twine bow. I normally use white cardstock for my backgrounds but changing it to yellow really made the card scream Spring! Happy Crafting and check out the Elizabeth Craft Designs blog - here for more Spring/Flower inspiration!

Uniquely Creative: Indigenous Journey Mini Kit

Image
Hello and Welcome! Today I'm sharing a card I created using Uniquely Creative Mini Kit (March) . This months kit contains a fun stamp set, two stencils and a few extra items that can be used for sentiments or embellishing a Scrapbook page. Here is the direct link for more details on whats included in the kits. I love that this kit included a few good masculine worded sentiments. Though the stamp set is inspired by indigenous designs - the set itself has a great geometric/pattern feel to it. Which for me is what I love and feel I best create with!   The card example above is one of four cards - I used red, orange and yellow to create my stamped focal points and connected the pattern by stamping the rest in grey and adding machine stitched lines. I embellished the card with a twine bow and some Uniquely Creative Enamel Dots.  Here is one more card example I'll share on my blog. For more inspiration on this months mini kit check out My Little Paper World o...

Elizabeth Craft Designs: Blossom, Bloom & Grow

Image
Hello and Welcome. Today I've got this card up on the Elizabeth Craft Designs blog with tutorial! Please check out the details: here . COPIC MARKERS USED: G14/G16/YR12/YR14/YR16/R12/R14/R17 Happy Crafting! *Entered into SSS - Wednesday Challenge - Anything Goes . Supplies Used: Other: Copic Blending Card Black Dye Ink Stamping Block Cuttlebug Copic Markers Twine/Sequins Foam Adhesive Tape

La La Land Crafts - Have You Heard? (Club La La Land)

Image
At the beginning of last year I said I wouldn't start another card kit or stamp subscription...but...towards the end of last year I came across a super cute club that I wanted to be apart of! La La Land Crafts has a fun monthly kit which comes with red rubber stamps and dies and today I'm sharing a few cards I created with my first kit (December).    Each card features the cute Panda Bear stamp/s and also includes the dies available in the subscription kit. I basically added card stock and a few embellishments to finish off each card. I decided I wanted to go really bright and colourful - a nice contrast to black and white bears.  My second card uses the negatives left over from the first card (I love it when I don't waste paper!). I of course added some stitching and coloured the bears in with Copic markers. Copic markers used provided below.  Supplies Used: La La  Land Crafts - December Club Kit  Card Stock Corrugated Card Copic Markers...

Elizabeth Craft Designs: Joset's Release (Go Wild!)

Image
Hello - It's January and with a new month comes a whole bunch of new releases! This one I'm especially excited about. Joset from Elizabeth Craft Designs has a beautiful release full of jungle critters and equally adorable accessories to complete each animal. Here is a card showcasing the new Monkey die and Jungle Leaves die. You can find all her new dies on the Elizabeth Craft Designs shop - here . There's a Zebra, Giffafe, Lion, even a Jeep! Seriously some fantastic designs to create fun jungle themed cards! I can't wait to show you more. Happy Crafting!

Ink Road Stamps: Mr & Mrs (Bella Flora)

Image
It's pretty much wedding season here in Australia - so I'm starting the year off using Ink Road Stamps Bella Flora to create this beautiful, monochrome white card. There is something very elegant and classy about white on white with a bit of gold! Head on over to Ink Road Stamps blog for full instructions on how I created with card.  I've had a few questions about how I got the texture on the fie cut flowers - it's not am embossing folder!... I have a rather large collection of corrugated cardstock. It' perfect for adding texture to cards especially when using dies.  I used Ink Road Stamps Block Party Alphas and Wow Embossing Powder (gold) to stamp and emboss the sentiment. Kept it Simple: Mr & Mrs. Thanks for stopping by and I hope you get a chance to try this very simple white on white technique using dies. I'll be showcasing all of Ink Road Stamps dies this month so keep an eye out on my next blog post for some die-cutting inspiration! ...

Craftin Desert Divas: Cupid Shot Me (Challenge #1)

Image
Happy New Year! I've had a very relaxed, slow start to 2019...Perhaps a little too relaxed as this is my first blog post for the year!  Today I'm sharing a card I created using a freebie I received from Craftin Desert Divas . A perfect stamp to play with for loved themed Valentines cards. I've paired this stamp with a Craftin Desert Divas cloud die. Coloured in with COPIC Markers. I've also decided to get back in to card challenges. Last year I mainly worked on design team projects and forgot how much I enjoy some of the challenges that are available - its a nice incentive to have a play and another reason to keep the blog updated! Check out The Southern Girls Challenge - Anything Goes . Happy Crafting!

Ink Road Stamps: Full Circle Recap 2018

Image
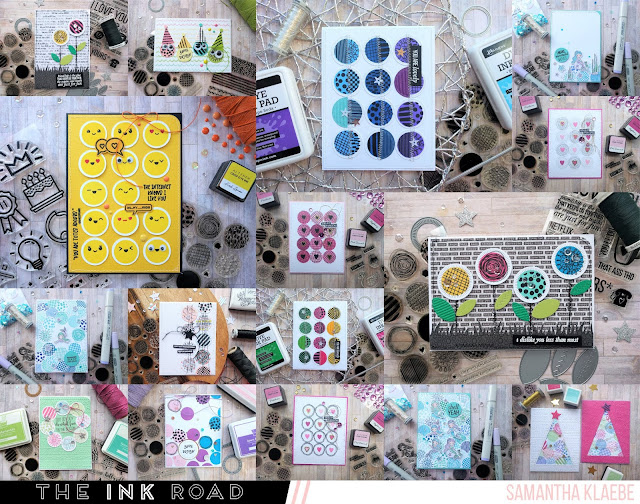
Hello! The lovely Lara from Ink Road Stamps gave us (design team) a break for December. So if you're hanging out for some Ink Road inspiration I will be back in full swing come January 2019! In the mean time however, going through my photos (a little computer "spring" cleaning) I realised that one of my favourite Ink Road Stamps for 2018 was Full Circle . I've made quite a few cards with it and I wanted to share all the different ways this one stamp set could be used... Check it out! All different - some of the cards I used the stamp set as a background, while others I used it to compliment other stamp sets. I'm looking forward to using this stamp set more in 2019, not to mention the new stamp sets coming soon to Ink Road Stamps. If you are not already an Instagram follower - I would love love love to see you follow and like this post on my Instagram: My Little Paper World . Happy Crafting!

Elizabeth Craft Designs: Winter Animals

Image
Hello! I feel I haven't posted on my blog for awhile in the lead up to Christmas! Not that I haven't been creating cards - I actually feel I've made too many cards (for Christmas) and my blog has just not been kept updated. However, I do hope you'll follow me on Instagram - My Little Paper World , I post all my cards here and it's a great way to follow my creative journey for the new year! Today I'm sharing a set of cards I created using Elizabeth Craft Designs: Winter Animals stamp set. I really wanted to create a repetitive background using the small pattern stamp and I thought that sticking to a monochrome colour scheme would make it easier. What are your thoughts on a blue owl? Purple Bear? Pink Squirrel? or Orange Fox?  I used my Copic Markers to colour each animal in - again because I went with monochrome colours the colouring was very simple. I picked three to four shades of blue and individually coloured each section of the owl. The sentiments...

Craftin Desert Divas: A Christmoose Card

Image
Hello! Welcome! Today I wanted to share a simple background technique that works really well with snowflakes and winter themed stamps. I'm using Craftin Desert Divas lastest release stamp set: Christmoose and the Snowflake Border die.  Card Instructions: Step 1: Create your background by drawing squiggly lines using Copic markers B00 through to B02 on Copic friendly cardstock. Corner punch the top right corner. Card front measurements: 10cm x 14.5cm Step 2: Die-cut three rows of snowflakes using the Snowflake Border die. Step 3: Adhere silver glitter cardstock behind your card front. Using black ink stamp the sentiment. Step 4: (Optional) Add machine stitched details. Step 5: Using foam tape adhere the Copic coloured in moose and snowflakes. Step 7: Embellish with sequins and twine. Adhere card front to an A6 card base. Here are two more card examples using the same technique – it’s a very quick technique perfect for re...