Posts

Showing posts with the label Ink Road Stamps

Ink Road Stamps: Mr & Mrs (Bella Flora)

Image
It's pretty much wedding season here in Australia - so I'm starting the year off using Ink Road Stamps Bella Flora to create this beautiful, monochrome white card. There is something very elegant and classy about white on white with a bit of gold! Head on over to Ink Road Stamps blog for full instructions on how I created with card.  I've had a few questions about how I got the texture on the fie cut flowers - it's not am embossing folder!... I have a rather large collection of corrugated cardstock. It' perfect for adding texture to cards especially when using dies.  I used Ink Road Stamps Block Party Alphas and Wow Embossing Powder (gold) to stamp and emboss the sentiment. Kept it Simple: Mr & Mrs. Thanks for stopping by and I hope you get a chance to try this very simple white on white technique using dies. I'll be showcasing all of Ink Road Stamps dies this month so keep an eye out on my next blog post for some die-cutting inspiration! ...
Ink Road Stamps: Full Circle Recap 2018

Image
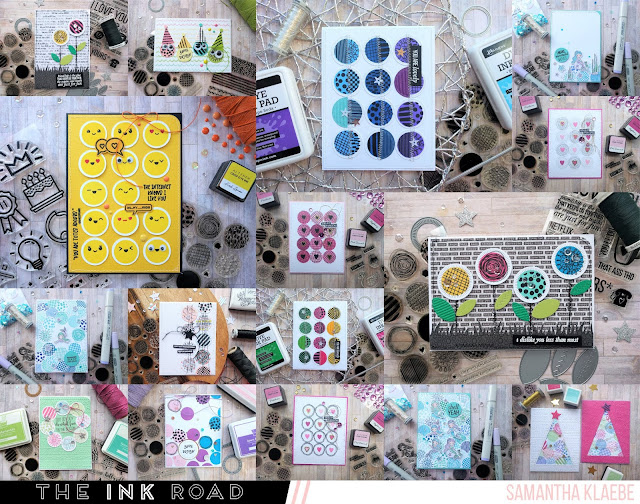
Hello! The lovely Lara from Ink Road Stamps gave us (design team) a break for December. So if you're hanging out for some Ink Road inspiration I will be back in full swing come January 2019! In the mean time however, going through my photos (a little computer "spring" cleaning) I realised that one of my favourite Ink Road Stamps for 2018 was Full Circle . I've made quite a few cards with it and I wanted to share all the different ways this one stamp set could be used... Check it out! All different - some of the cards I used the stamp set as a background, while others I used it to compliment other stamp sets. I'm looking forward to using this stamp set more in 2019, not to mention the new stamp sets coming soon to Ink Road Stamps. If you are not already an Instagram follower - I would love love love to see you follow and like this post on my Instagram: My Little Paper World . Happy Crafting!

Ink Road Stamps: Happy Holla Days

Image
Hello! I'm on the Ink Road Stamps blog today with this fun Christmas card with the best sentiment ever! Here is the card! When it comes to Christmas cards I like to keep them simple enough to create a few extra cards. This card is no exception. Especially with a sentiment like that! Card Instructions: Step 1. Stamp striped image (from Between the Lines ) and sentiment ( from Happy Holla Days ) on Kraft card. Card Measurement: 10.5cm x 15.5cm Step 2. Corner punch top right corner. Step 3. Die-cut small circles (varying in size). Stamp Happy Holla Day images as shown below. Step 4. Assemble card - Use foam tape to adhere the stamped circles to your card front. Embellish with sequins and a twine bow. Adhere card front to an A6 card based . Here is the same card but in white. Which card do you prefer? For original blog post on the Ink Road Stamp blog go here . Happy Holla Days!

Ink Road Stamps: Full Circle Let's Party!

Image
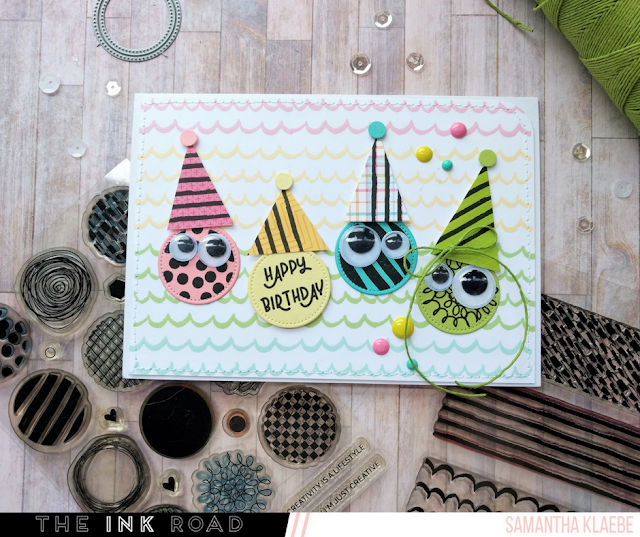
I'm on the Ink Road Stamps blog sharing this fun card! Check it out - here . I first started by creating my stamped background using  Between the Lines . I stamped these using four ink colours I knew would work well together and in colours that I had matching paper to create my googly eyed circle characters with. You could try any combination of colours – I had even though red hats would make fun Christmas themed cards! Next, I die-cut four circles in co-ordinating cardstock. I used black ink and stamped three of them with a few stamps from  Full Circle . I stamped the sentiment from  Just A Number  on one circle and then adhered these to my card front. I don’t own any hat dies and I didn’t want to purchase a cut file so I simply cut out different sized triangles from pattern paper. These were also stamped (for added interest, using  Between the Lines ) and then adhered above each circle using foam tape. I then used a small circle punch for the pompoms ...

Ink Road Stamps: Fa Rawr Rawr RAWR!

Image
I'm on the Ink Road Stamps blog with this fun Christmas card! Feel free to check out how I created this card - here . For this card I’ve used  Block Party Alphas  +  Outline  stamp sets to customise the sentiment. The dinosaur is a silhouette cameo cut and of course I added my signature stitching and embellished the card with enamel dots and a twine bow. I also added Between the Line stamp set to add detail to the dinosaur! It came together really well... Happy Crafting!

Ink Road Stamps: Start of Something New

Image
Welcome! Today I am NOT sharing a card! For the last few years card making has been all I've done. Many, many years ago I use to scrapbook and create off the page art - but with young kids I quickly decided it wasn't for me anymore and let my creativity fall into one area of card making!  I've been following a few crafty ladies whose traveling notebooks kick started my want to give it a try. Follow my original blog post - it has a few more details on how I created my first notebook page. Go to the Ink Road Stamps blog - here . Otherwise check out the photos below! I went a little overboard with the detailed photos - it was a little challenging taking photos of something other then a card. There are so many details - the stitching, glitter, stamping, embellishments. I wanted to capture it all. Supplies Used: Ink Road Stamps - Chin Up Buttercup Traveller's Journal Altenew Ink Silhouette Cameo Printer Sewing Machine Sequins Twine C...

Ink Road Stamps: You Are Lovely!

Image
Hello! Here is a card I created using two Ink Road Stamps.  I decided to make my own bright rainbow using the Between the Lines stamp and a simple (yet always satisfying) technique I've used on many occasion: masking. The other stamp set used in this card is Majestic AF - another absolute favourite of mine. Here is my card: For complete instructions and original blog post go to Ink Road Stamps Blog - here . Here is another example of the card above. This card involved a lot more masking but I really love these unicorns and creating this rainbow. This card is a great example of how  thinking outside the box allows you to create with stamp sets that otherwise wouldn’t necessarily be used that way. I really wanted to create a rainbow and I found the perfect stamp for it! Happy Crafting!

Ink Road Stamps: SMS Collaboration Instagram Hop

Image
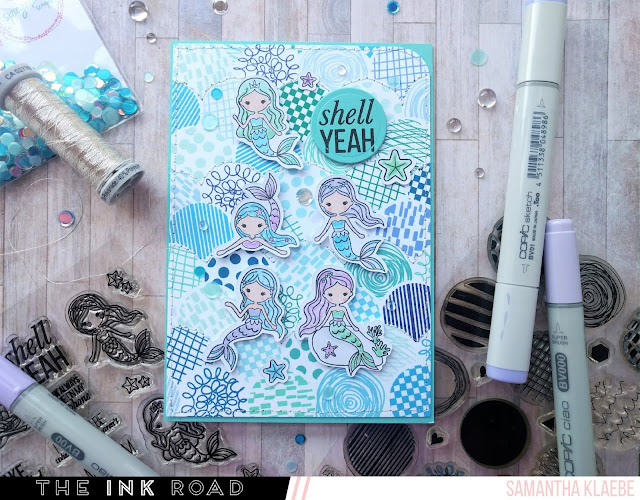
Did you miss the Ink Road Stamp / Spiegelmom Scraps Collaboration Instagram Hop ? (Wow - that's a bit of a mouth full!) I love Instagram hops - so much inspiration! Check out my card below - this was the card I created for the hop . The hop was to showcase the new Ink Road Stamp bundle featuring the Shell Yeah (mermaid themed) stamp set! I'm a huge mermaid fan - add it to the unicorn, llama, and robot stamp collection of themes I can't say no to! The mermaids were stamped and coloured in with Copic Markers. To create my background I used Ink Road Stamps: Full Circle and a simple masking technique which allowed me to create my scalloped looking ocean. I of course added machine stitching and embellished the card with sequins and acrylic bubbles (both available in the bundle).  Here are two additional cards following the same masking and stamping technique.  This card (below) is also on the Ink Road Stamps blog - with more details on how I created it...

Ink Road Stamps: Fir Real

Image
I love it when I can make the most of my stamp sets especially ones designed for Christmas! You can find my original blog post on the Ink Road Stamps Blog (with written instructions on how I created this fun sunny non Christmas related card). Stamps: Ink Road Stamps: Fir Real Ink Road Stamps: Majestic AF Happy Crafting!

Ink Road Stamps: Bella Flora Meets Full Circle

Image
Hello!  My Copic marker colouring has improved so much this year - but before I used Copic markers I would try to find other alternatives - paper piecing  for example or a technique I've used for today's card. For these cards I used smaller stamps (circles from Ink Road Stamps: Full Circle stamp) to fill in the flower image! I actually love this technique because you don't need to be precise and it is an extremely quick stamping process using a few shades of ink and a simple stamp block. I decided to use Altenew inks - they take out all the hard work of picking ink colours that work well together. After I stamped Ink Road Stamps: Bella Flora I then had my silhouette cut out the images and happily stamped the smaller circles using different shades of ink colours while watching an episode of Smallville.  This stamp set is very pretty - it almost screams out bling me up with some gold! So I embellished the card with some gold sequins and added a gold ma...