Posts

Ink Road Stamps: Full Circle Recap 2018
Image
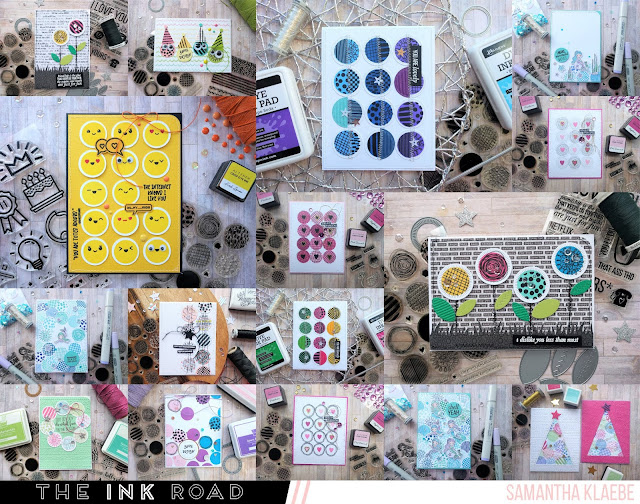
Hello! The lovely Lara from Ink Road Stamps gave us (design team) a break for December. So if you're hanging out for some Ink Road inspiration I will be back in full swing come January 2019! In the mean time however, going through my photos (a little computer "spring" cleaning) I realised that one of my favourite Ink Road Stamps for 2018 was Full Circle . I've made quite a few cards with it and I wanted to share all the different ways this one stamp set could be used... Check it out! All different - some of the cards I used the stamp set as a background, while others I used it to compliment other stamp sets. I'm looking forward to using this stamp set more in 2019, not to mention the new stamp sets coming soon to Ink Road Stamps. If you are not already an Instagram follower - I would love love love to see you follow and like this post on my Instagram: My Little Paper World . Happy Crafting!

Elizabeth Craft Designs: Winter Animals

Image
Hello! I feel I haven't posted on my blog for awhile in the lead up to Christmas! Not that I haven't been creating cards - I actually feel I've made too many cards (for Christmas) and my blog has just not been kept updated. However, I do hope you'll follow me on Instagram - My Little Paper World , I post all my cards here and it's a great way to follow my creative journey for the new year! Today I'm sharing a set of cards I created using Elizabeth Craft Designs: Winter Animals stamp set. I really wanted to create a repetitive background using the small pattern stamp and I thought that sticking to a monochrome colour scheme would make it easier. What are your thoughts on a blue owl? Purple Bear? Pink Squirrel? or Orange Fox?  I used my Copic Markers to colour each animal in - again because I went with monochrome colours the colouring was very simple. I picked three to four shades of blue and individually coloured each section of the owl. The sentiments...

Craftin Desert Divas: A Christmoose Card

Image
Hello! Welcome! Today I wanted to share a simple background technique that works really well with snowflakes and winter themed stamps. I'm using Craftin Desert Divas lastest release stamp set: Christmoose and the Snowflake Border die.  Card Instructions: Step 1: Create your background by drawing squiggly lines using Copic markers B00 through to B02 on Copic friendly cardstock. Corner punch the top right corner. Card front measurements: 10cm x 14.5cm Step 2: Die-cut three rows of snowflakes using the Snowflake Border die. Step 3: Adhere silver glitter cardstock behind your card front. Using black ink stamp the sentiment. Step 4: (Optional) Add machine stitched details. Step 5: Using foam tape adhere the Copic coloured in moose and snowflakes. Step 7: Embellish with sequins and twine. Adhere card front to an A6 card base. Here are two more card examples using the same technique – it’s a very quick technique perfect for re...

Elizabeth Craft Designs: November Designer Challenge

Image
This months  Elizabeth Craft Designs  designer challenge theme is a  Floral Christmas - this could be simply a Christmas tree or the pretty Poinsettia or other Christmas foliage that is used for Christmas decorations. For my card today I am using the new released  Poinsettia   Clear Stamp set with coordinating dies and the  Classic Christmas Sentiments  Clear Stamp set. Coloured in with Copic Markers:  Leaves: G14/G16/G17/G19 Flower: R22/R24/R27/R29 I kept this card quite simple. Firstly by stamping a light grey leafy background before colouring in and adding the Poinsettia flower. I embellished the card with sequins and added a twine bow. I also highlighted the center of the flower with a gold pen.   For more Christmas Floral inspiration check out what the design team has created - here . For our Challenge today Elizabeth Craft Designs is giving away a  $20 Gift Card to  3 lucky winners.  To ent...

Ink Road Stamps: Happy Holla Days

Image
Hello! I'm on the Ink Road Stamps blog today with this fun Christmas card with the best sentiment ever! Here is the card! When it comes to Christmas cards I like to keep them simple enough to create a few extra cards. This card is no exception. Especially with a sentiment like that! Card Instructions: Step 1. Stamp striped image (from Between the Lines ) and sentiment ( from Happy Holla Days ) on Kraft card. Card Measurement: 10.5cm x 15.5cm Step 2. Corner punch top right corner. Step 3. Die-cut small circles (varying in size). Stamp Happy Holla Day images as shown below. Step 4. Assemble card - Use foam tape to adhere the stamped circles to your card front. Embellish with sequins and a twine bow. Adhere card front to an A6 card based . Here is the same card but in white. Which card do you prefer? For original blog post on the Ink Road Stamp blog go here . Happy Holla Days!

Uniquely Creative: Polar Pals Colour & Stamp (October Release)

Image
Good Morning! I wanted to share the cards I created for Uniquely Creatives October Stamp & Colour Kit - Polar Pals. This kit is now available and you can find all the details on the Uniquely Creative Shop - here . The cards below are featured in the Polar Pals magazine which comes with the October Stamp & Colour Kit. This magazine includes card instructions as well as more inspiration from other design team members.  Christmas Wishes:  Coloured in with Copic Markers Stamp: Polar Pals Die: Circle Cover Plate Big Bear Hugs:  Coloured in with Copic Markers Stamp: Polar Pals Big Bear Hugs :  Coloured in with Copic Markers Stamp: Polar Pals Die:  Hearts Wreath Die You're So Cool :  Coloured in with Copic Markers Stamp: Polar Pals & Penguin Pals Die: Stitched Penant Frames Big Bear Hugs :  Coloured in with Copic Markers Stamp: Polar Pals If you also didn't know this release comes with co-ordina...

Ink Road Stamps: Full Circle Let's Party!

Image
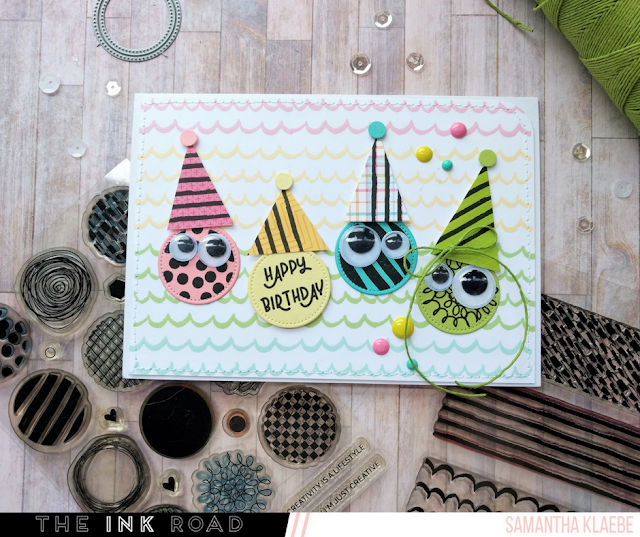
I'm on the Ink Road Stamps blog sharing this fun card! Check it out - here . I first started by creating my stamped background using  Between the Lines . I stamped these using four ink colours I knew would work well together and in colours that I had matching paper to create my googly eyed circle characters with. You could try any combination of colours – I had even though red hats would make fun Christmas themed cards! Next, I die-cut four circles in co-ordinating cardstock. I used black ink and stamped three of them with a few stamps from  Full Circle . I stamped the sentiment from  Just A Number  on one circle and then adhered these to my card front. I don’t own any hat dies and I didn’t want to purchase a cut file so I simply cut out different sized triangles from pattern paper. These were also stamped (for added interest, using  Between the Lines ) and then adhered above each circle using foam tape. I then used a small circle punch for the pompoms ...