Posts

Showing posts from March, 2018

Craftie Cafe: Happy Easter #2 (+ Shaker Card!)

Image
Memory Box always has very versatile and cute dies – the Sketch Bunny and Background were perfectly paired together to create so many different options that they were instantly added to my Craftie Café shopping cart so that I could share two ways to create a card with them. The first card I decided I wanted see what these bunnies would look like together. So I created a simple layout that showcased the bunnies. I first die-cut the background bunnies (x6) which I then stamped using Impression Obsessions – Mini Patterns 2 - Cling Rubber Stamp and a selection of lawn fawn inks. I then die-cut the sketch bunny (outline) in co-ordinating colours that matched the inks and then adhered the pairs together. I assembled my card – stamping the sentiment and adhering the six bunnies to my card front. I machine stitched a white border (optional) and I added little pompoms (I’m not entirely sure what they’re called – but they came out of my kids craft box!) for little bunny tails. Here i...

Ink Road Stamps: XO

Image
I'm sharing this quick fun card I created using a few of my favourite Ink Road Stamps . It's been ages since I've distressed edges on a card front - so I love how this turned out.  Here is the card: I simply stamped the sentiment 'XO' using the Ink Road Stamp set Block Party Alphas (Outline), masked it off, then stamped the ferns from Frond of You using a 'rock n roll' technique in a few green/blue Altenew ink tones.  Once the stamping process was completed I trimmed the card to 3 inches x 3 inches, added a machine stitched line and then matted it to light green card slightly larger than the measurements above. This was then adhered to my card front and embellished with sequins and twine. I distressed and tore the edges around the stitched area slightly with my hands to create interest and give a textural element to the card. Thanks for stopping by! Hope you liked this card - and feel inspired to try some fun 'rock n roll' stampi...

Uniquely Creative: Whimsy Bunnies

Image
Recently, I've taken the time to pick a few stamp sets in my stash and FINALLY! use them...This Uniquely Creative : Whimsy Bunnies stamp was actually a more recent purchase but I had my creative idea and knew I wanted to create a dream like, whimsy background. Since I didn't have any suitable cloud dies I decided to purchase a cut file from The Cut Shoppe - I absolutely love their cut files and there were two that were perfect backdrops for these whimsical bunnies. Here is my first card using The Cut Shoppe:  A Walk in the Clouds This cut files was 12x12 so I did shrink it a little and trimmed it to work it on to my card base. I've used a combination of cardstock, corrugated card, glitter card, vellum and ribbon to piece the cloud and negative space. There's actually quite a bit going on - machine stitching to some of the clouds, sequins, tiny stamped images (from the Whimsy Bunnies set), I've used a embossing folder on some of the cardstock and added ...

Elizabeth Craft Designs: March Challenge (Frame it!)

Image
It's Challenge time again over at Elizabeth Craft Designs . The theme: Frame it! So many option, so many ideas! I decided to create a card using the Entwined Egg die. The biggest challenge for me was finding a medium that would create a really light pastel palette. I originally tried Distress Inks but wasn't happy with how it turned out. In the end I realised that the only light enough colours I own would be my Copic markers - so using BV, RV, R, and Y in numbers ranging from 000-1 I created two cards. Here is my first card for the Frame It challenge:  I created my background using ECD: Bouquet Embossing Folder. I cut the Entwined Egg die on Copic friendly paper and coloured it in using my Copic markers. Next I die-cut a few of the flowers in a range of colour coordinating paper that matched the egg frame. I added sequins and embellished it with a bow. The sentiment is from Elizabeth Craft Designs: Spring Sentiments . Here is a second card. Same design but ...

Ink Road Stamps: Search Word Puzzle Card

Image
Today's card is inspired by search word puzzles...I should use the term lightly as I've already highlighted (using Ink Road Stamps  - Alpha Block Party Outline ) the words I want you to find...and...I haven't added any other words for you to actually search for. But this is one of those stamp sets you could well and truly create your own search word puzzle with - if you wanted to!  As you scroll down you'll notice I did create a few cards using the same stamping process. The grid was simply created in Microsoft Word and printed on white cardstock - then trimmed.   I then started stamping the sentiment using both Ink Road Stamps - Block Party Alpha and Block Party Alpha Outline , alternating in ink colours (Altenew). I filled in the rest of the grid with random letters. The card front was then  matted to a card base and embellished with sequins Hello Hey Cutie #YOLO Make A Wish Awesome So many options - and I do love the idea of taking ...

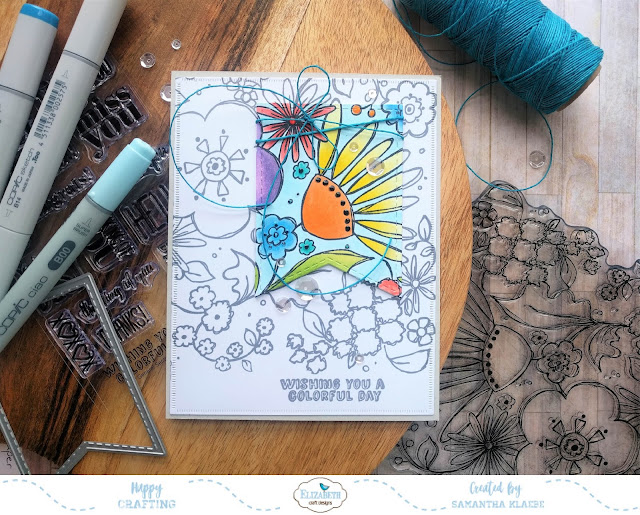
Elizabeth Craft Designs: Wishing you a Colorful Day!

Image
Today I'm sharing a card I created using left over strips of coloured card along with Elizabeth Craft Designs: Floral Background stamp. This is the second card (view first card here ) I've created this month using this clear stamp set and I absolutely love how versatile background stamps like this can be... Here is my card: If you're after a step by step tutorial you can visit the Elizabeth Craft Designs blog - link here , where I've included instructions as well as some photos and tips on how to re-create my card. Thanks for stopping by - hope you enjoyed this card. For more inspiration like this feel free to follow me on Instagram - My Little Paper World . I'll be back in the next few days sharing some more Elizabeth Craft Design cards this time with Easter as my inspiration! Happy Crafting!

Elizabeth Craft Designs: Surprise! Happy Birthday Els Blog Hop!

Image
Surprise! Happy Birthday Els Blog Hop It's  Els van de Burgt's  birthday and what better way to celebrate then to celebrate with a surprise Birthday Blog Hop with the Elizabeth Crafts Design Team! Happy Birthday Els! Here is my birthday card for you: This card was created using Elizabeth Craft Designs Floral Background stamp. I don't use my background stamps enough and I love when I get an opportunity to colour and use my copics. So for my card today I decided to create a spotlight card. Colouring in only a section of the card and leaving the rest as is - simply stamped in grey ink.  After the card front was stamped I restamped the image using black ink on a copic friendly card that I had die-cut with Elizabeth Craft Designs - Stitched Fishtails . This section was coloured in. Before I assembled my card together I added twine to the top of my fish tail and elevated it using foam tape. I also die-cut my card front using Elizabeth Craft Designs - Dashin...