Uniquely Creative: Whimsy Bunnies
Recently, I've taken the time to pick a few stamp sets in my stash and FINALLY! use them...This Uniquely Creative: Whimsy Bunnies stamp was actually a more recent purchase but I had my creative idea and knew I wanted to create a dream like, whimsy background. Since I didn't have any suitable cloud dies I decided to purchase a cut file from The Cut Shoppe - I absolutely love their cut files and there were two that were perfect backdrops for these whimsical bunnies.
Here is my first card using The Cut Shoppe: A Walk in the Clouds
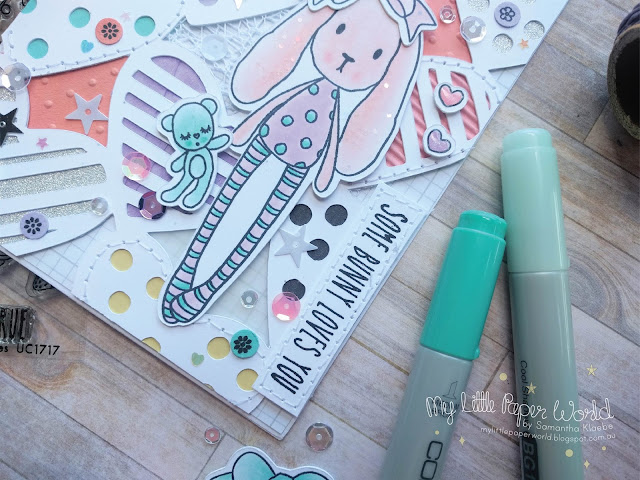
This cut files was 12x12 so I did shrink it a little and trimmed it to work it on to my card base. I've used a combination of cardstock, corrugated card, glitter card, vellum and ribbon to piece the cloud and negative space. There's actually quite a bit going on - machine stitching to some of the clouds, sequins, tiny stamped images (from the Whimsy Bunnies set), I've used a embossing folder on some of the cardstock and added glossy accents to the little hearts after colouring them in with my Copics.
After I finished the background (three days later...) I could start colouring in the sweet bunny from Uniquely Creative: Whimsy Bunnies stamp set. This part of the card was a so much quicker then the first part. I stamped the image using Memento: Black Onyx ink and cut the bunny out with my Silhouette. I coloured the bunnies dress and bow in light purple (V000-V01) and used light pink (which was done using a combination of Copic Markers R0000-R01) for the bunnies face and body.
After the bunny was coloured in I added chunky glitter to her dress (see below). The card originally was going to be a shaker card but by the time I got to this stage I felt there was quite a lot going on but I didn't want to cover up my background with a solid balloon so I still used the balloon frame (Balloon die: Concord and 9th). I also added acetate to 'close' the balloon even though it wasn't a shaker I liked the idea of a see through balloon - it added to the theme of a whimsical dream.
After the bunny was coloured in I added chunky glitter to her dress (see below). The card originally was going to be a shaker card but by the time I got to this stage I felt there was quite a lot going on but I didn't want to cover up my background with a solid balloon so I still used the balloon frame (Balloon die: Concord and 9th). I also added acetate to 'close' the balloon even though it wasn't a shaker I liked the idea of a see through balloon - it added to the theme of a whimsical dream.
My second card has the same above technique and supplies used. This time I'm using the second bunny in the stamp set and combining it with The Cut Shoppe: The Hello Heart cut file.
Here is the card:
I'm not entirely sure what you would call this 'technique' its like paper piecing gone wild! I'll be sharing a few more cards using this technique though in the next few weeks...
Thanks for stopping by.
Happy Crafting!


Very sweet bunnies!!
ReplyDelete