StickerKitten: Unicorn Fairground Part.2
Hello!
Last month I received my first collection kit from StickerKitten. With it I created a fun set of three cards (you can view them here.) Soon after as I was cleaning up the mess I had made I came up with another layout to use up some more ephemera and pattern paper from their paper packs.
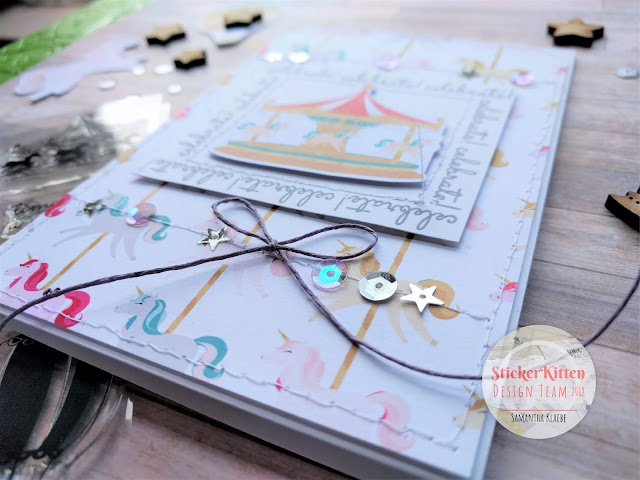
Here is the card:
Card Instructions:
Step 1: Create a card front using pattern paper from Unicorn Fairground paper pack. Use a corner punch to the top right corner.
Measurements: 10.5cm x 15cm
Step 2: On white card stamp the sentiment 'celebrate' as shown. Trim to size.
Measurements: 8cm x 7cm
Step 3: Add machine stitched details. (Optional)
Step 4: Using foam tape adhere the ephemera and sentiment piece to card base.
Step 5: Embellish with StickerKitten sequins and finish off with a twine bow. Adhere card front to a side folding card base.
Tips: Instead of machine stitched lines use a white, light purple or light grey felt tip pen to create faux stitch lines. Also don't be afraid to add additional features to ephemera. I added clear Wink of Stella to the hot air balloon to highlight areas...
This is a simple layout and with so much ephemera left over from the first set of cards I decided to create a few more cards using the same design. I just changed the pattern paper to co-ordinate with the chosen ephemera.
Here is the third card in this set:
Supplies List:
Unicorn Fairground Iridescent Sequins
Unicorn Fairground Black Star Sequins
Unicorn Fairground Die-Cut Ephemera
Other:
Twine
Sewing Machine
Adhesives
Altenew Ink
I suspect I will have another set of cards using more ephemera from this Unicorn Fairground Collection Kit - even after making a total of 6 cards all up I still have half a pack left to create with...
Thanks for stopping by!
Unicorn Fairground Black Star Sequins
Unicorn Fairground Die-Cut Ephemera


Wonderful cards!!
ReplyDelete